Choosing between a studio and an outdoor setting for your headshot is a big decision. It’s like picking between a Scorsese tracking shot and a Cassavetes improv. Both have their own special qualities, but they offer different experiences.
In a studio, you get predictability. Think of it as consistent lighting, no wind messing with your hair, and a backdrop that won’t surprise you. On the other hand, outdoor shoots offer a unique vibe. Imagine green trees, vibrant cityscapes, or rustic brick walls. Each setting has its own charm, but it also comes with its own challenges.
Preparation can make your headshot experience enjoyable. Knowing which environment you prefer is key. Do you feel at home in a studio or do you love the outdoors? The best headshot captures your true self, not just how you look.
Background playbook: seamless texture, brand backdrop, and environment options
The backdrop in headshots can be a hero or a villain. The right one can make your image stand out or blend in. It’s like a silent partner that boosts your professional look.
In a studio, you can choose from seamless paper or a hand-painted canvas. A good backdrop contrasts well with your outfit, making your personality shine. For example, a light blue background can make darker clothes pop, grabbing everyone’s attention.
But outside, you have even more options. Imagine a textured brick wall for creativity or a blurred park scene for a friendly vibe. Each background tells a story and should match your industry’s vibe. An accountant in front of graffiti might be bold but not the best choice.
I once shot a fintech team against a bright lime-green wall. It matched their bold brand and tripled their LinkedIn engagement. This shows how the right background can boost your professional story.
Don’t be a tourist in front of famous landmarks. Choose backgrounds that match your brand’s values. The right one can make your image stronger and tell your story in the competitive world of headshots.
Light expectations: softbox, window, reflector, and sun angle basics
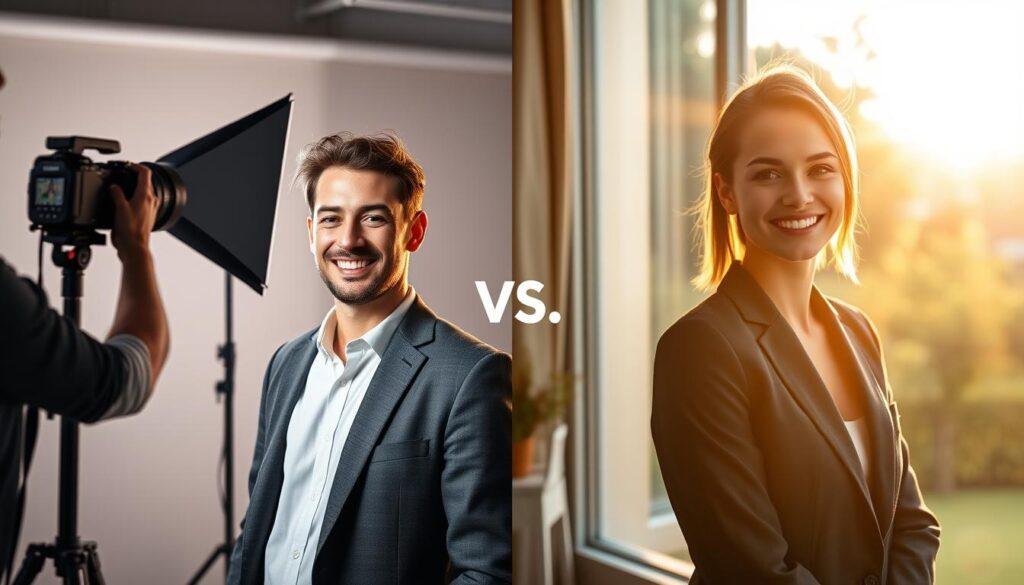
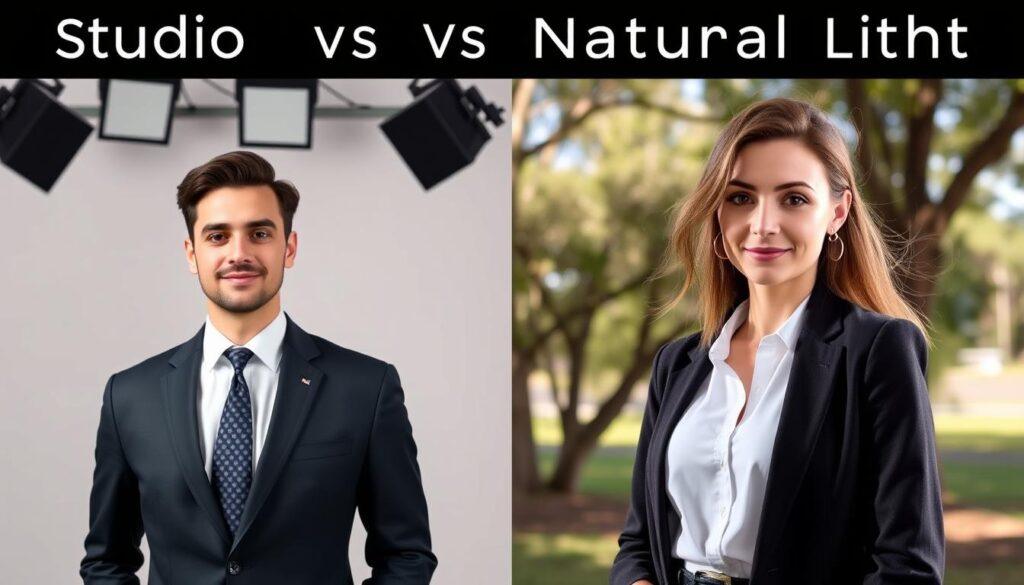
Light is the invisible artist behind the scenes, shaping your headshot’s mood and message. The debate between studio vs natural light is ongoing. Each has its own charm and challenges, affecting your headshot greatly.
In a studio, you’re in control. With a softbox and a reflector, you can shape light to highlight your features. This setup offers control, creating a flattering glow that can enhance your jawline or soften imperfections. A softbox is more than just an umbrella; it’s a tool to fight harsh shadows.
Window light is perfect for introverts—it’s soft, directional, and forgiving. It can transform simple moments into something deep. Imagine it as your own Vermeer painting, where light softly plays on your face, making you look radiant.
But outdoors, you’re at the sun’s mercy. The sun’s angle at 2 p.m. versus 5 p.m. can change your look. It’s like the difference between a visionary leader and someone squinting. I’ve used a reflector on a windy rooftop to add a touch of light to an executive’s eyes.
For outdoor shoots, mixing natural light with studio strobes can create amazing results. Our team loves capturing outdoor headshots with sunlight peeking through. This mix allows for creative freedom, ensuring you get the perfect shot no matter the weather.
In summary, mastering light basics—whether through a softbox, window, or the sun—can improve your headshot. For more on lighting, check out this photography lighting guide.
Wardrobe by setting: contrast with backdrop, footwear for walking or standing
Your outfit is key in headshots, speaking volumes before you say a word. The right clothes can make you stand out and elevate your image. It’s not just about looking good; it’s about making a statement.
When picking your outfit, think about the contrast with your backdrop. Dark colors show authority, while light shades are friendly. A mix, like a dark jacket over a light shirt, shows both professionalism and friendliness. This helps you stand out, not blend in.
Layering is a great trick. It adds depth and interest to your photos. Stick to solid colors to avoid distractions. Deep blues, reds, and greens are great for headshots. They help show your personality, not your clothes.
Footwear is important too. In a studio, heels might work. But outdoors, think about the terrain. A fancy pair of shoes can be a problem on uneven or wet ground. Choose shoes that are stylish but also practical for walking.
Your clothes should make you feel powerful. That blazer that makes you feel like you can solve anything? Wear it! The right outfit boosts your confidence and makes your headshot powerful.
| Color | Vibe | Best Use |
|---|---|---|
| Dark Colors | Formal, Authoritative | Professional settings |
| Light Colors | Friendly, Approachable | Casual environments |
| Solid Colors | Focused, Clear | Highlighting personality |
| Layered Outfits | Dynamic, Interesting | Varied shots |
Logistics: parking, access, load-in, elevator, badges, and permits
Getting the logistics right for your headshot session can make all the difference. A smooth start means you can relax and show off your best smile. Avoiding parking headaches is key to a stress-free session.
For studio shoots, think about the basics. Is there an elevator, or will you be carrying heavy bags up stairs? Will you need a loading dock for your gear? Knowing these details can prevent a meltdown.
Location shoots bring their own set of challenges. Find a parking spot that won’t break the bank. And check if you need a permit for your location. I once had a client struggle to find the studio door because the signs were too subtle.
To avoid such issues, confirm access codes and check the load-in path. Building in extra time is also smart. You want to look great, not rush through your poses.
Plan your session with enough time before and after. This way, you can enjoy the experience without worrying about time. Remember, while logistics might not be exciting, they’re essential for a great headshot.
Weather plan B: wind, heat, cold, humidity, and hair or makeup protection
Outdoor headshots can be tricky because Mother Nature can be a real diva. Wind can mess up your hair, and humidity can make your skin look shiny. Direct sun can make you squint, and heat can make your hair droop.
This section is your backup plan against bad weather. You’ll need a covered spot, like a bridge or a lobby. Use anti-humidity spray and blotting papers. And don’t forget a portable fan to keep you cool.
Studio shoots don’t worry about weather, but getting from your car to the studio can be wet. Be ready with a spare shirt, a steamer, and know that weather can change fast.
Here’s a quick reference table to help you navigate different weather conditions:
| Weather Condition | Impact on Shoot | Recommended Solutions |
|---|---|---|
| Wind | Messy hair, unflattering angles | Hair spray, portable fan |
| Heat | Shiny skin, sweat | Blotting papers, cooling towels |
| Cold | Red skin, shivering | Warm layers, hand warmers |
| Humidity | Frizzy hair, uneven skin | Anti-humidity spray, moisture-wicking makeup |
For more tips on protecting your makeup outdoors, see this helpful guide.
Privacy and safety: public spaces, offices, permits, and security checks
Planning your headshot session can feel like a high-stakes game of chess. You might find the perfect spot, like a brutalist concrete wall. But then, a security guard shows up, asking for your permit. It’s like a record scratch!
Privacy and safety aren’t just about avoiding photobombers. They involve understanding the invisible rules of public and private spaces. In an office, working with building management is key. You don’t want to accidentally capture a colleague’s salary spreadsheet in the reflection, right?
Getting permits can seem like a Kafkaesque nightmare. But they’re often cheaper than a fine. Think of it as an investment in your peace of mind. It lets you focus on your headshot without worrying about legal issues.
Personal safety is also important. If you’re shooting in a less-trafficked area, bring a buddy. It’s not just for moral support; gear theft is a real concern. You want to create a calm space where you can be vulnerable in front of the lens without feeling like you’re committing a misdemeanor.
So, whether you’re sweet-talking a facilities manager or figuring out permits, remember that preparation is key. You can find more insights on this topic in our guide about urban energy and nature at urban energy and nature.
Timeline samples: 30, 60, 90 minute sessions with buffers
Timing is everything in headshot sessions. Knowing how to manage time is key to capturing your best self. Each session length lets you show different sides of your personality. It’s important to know what you can do in each time frame.
Let’s break it down:
| Session Length | Outfit Changes | Backdrop Options | Ideal For |
|---|---|---|---|
| 30 Minutes | 1 | 1 | Quick Corporate Headshots |
| 60 Minutes | 2-3 | Multiple | Standard Headshot Sessions |
| 90 Minutes | 3+ | Variety | Extended Sessions |
A 30-minute session is like a quick espresso. It’s fast and intense. You’ll have just enough time for one great shot. A 90-minute session, on the other hand, is like a slow-brew coffee. You have plenty of time to try different outfits and have a deep conversation. This is when you might really capture who you are.
Buffers are not just extra time. They’re like a safety net. They help you avoid feeling rushed. Adding 10-15 minutes per person for team shots can make a big difference.
Scheduling your session in the morning is a good idea. Your brain will be fresh, and you won’t be tired from making too many decisions. This can make a big difference in how your portrait turns out.
For more tips on timing, check out this resource. It’s a quick read that can help you prepare for your headshot session.
Packing list: garment bag, lint kit, HMUA kit, water, and snacks
Are you packing for your headshot session? It’s like getting ready for a superhero mission. You need to be prepared for anything. A good packing list can make all the difference in your photos.
First, grab your garment bag. It keeps your clothes looking sharp and wrinkle-free. You don’t want to look like you just woke up, do you? A garment bag shows you’re serious and ready to go.
Don’t forget the lint roller. It’s a hero for your outfit. Pet hair and dust can ruin your look. A quick lint roll can save the day.
If you’re getting hair and makeup done, bring your touch-up kit. It should have things like translucent powder and lip balm. A comb for flyaways is also a must. It’s like having a stunt double for your face.
Remember to pack water and snacks. Low blood sugar can make you look tired. I once saved a session with a granola bar because the client forgot breakfast.
Also, bring some extra things like reference photos or extra earring backs. These can help you stay focused and feel more confident.
In short, packing for your headshot is about being smart, not about how much you bring. With the right stuff, you can focus on being your best self in front of the camera.
Post session: selects, delivery, retouch requests, and usage notes
The camera has clicked, and the lights have dimmed. What now? This is where the magic of headshot session prep truly begins. You won’t need to make hasty decisions on the spot. Instead, you’ll receive a selection gallery that allows you to mull over your choices.
It’s wise to sleep on it. What may seem like a double chin in the evening light might transform into a shadow of gravitas after a good night’s rest.
Expect your final photos to arrive via email within 7 to 10 days. If you’re in a hurry, be prepared for a rush fee that compensates the retoucher’s sleepless nights. When it comes to retouch requests, tread carefully. You want to look like yourself, just the well-rested version, not an AI-generated clone.
The skilled retouchers at Chad Isaiah Studios understand this balance, ensuring your skin retains its natural texture.
Understanding usage notes is key. A headshot for LinkedIn demands different cropping than one intended for a conference banner. Familiarize yourself with license terms. You can’t just slap your image on a billboard without permission.
This section aims to clarify the entire handoff process, from selecting your best shots to providing feedback that doesn’t leave your photographer in tears. With these insights, you’re ready to make the most of your headshot experience.