Welcome! We’re here to help you choose the right place for your headshot.
Think of it as a handshake in photo form. This image must instantly communicate who you are before you meet.
What message do you want to send? Do you need to show trust and authority, like a lawyer? Or do you want to show vibrant energy and creativity, perfect for a designer?
The setting you choose sends a message. A studio or a meaningful location can tell a lot through environment cues.
These visual signals in the background and lighting tell a story. We’ll help you define your message first. Then, every decision can support your personal brand story.
Getting this foundation right is key for powerful personal branding photography. Let’s find the setting that truly sells you.
Studio Pros/Cons: control, consistency, color, cost
Imagine a space where you control every part of your portrait. This is what a photography studio offers. It’s like a blank canvas where you can focus on creating the perfect image without distractions.
Let’s explore the key benefits and things to consider.
The studio’s biggest advantage is control. You can shape every detail with studio lighting. Say goodbye to bad lighting and hello to professional looks on demand.
Another big plus is consistency. Need headshots for your team? The studio makes it easy. You can keep the same look for everyone, which is great for company images.
Color is also a big deal in a studio. You can choose from many backdrop colors. This lets you match your brand perfectly.
Choosing the right backdrop colors can change the mood of your photo. A deep charcoal can look serious, while soft pastels are more friendly. This lets you match your image with your brand’s message.
But, there are downsides. The biggest one is cost. Renting a studio and equipment can be expensive. It’s a big investment for control and consistency.
Another issue is the risk of images feeling too perfect. Without real context, a headshot relies on your expression and the photographer’s skill. A bad photographer might make your photo look flat.
Here’s a quick comparison to help you see the trade-offs:
| Aspect | Pro (The Advantage) | Con (The Consideration) |
|---|---|---|
| Control | Total command over studio lighting and conditions. | Requires technical knowledge to use effectively. |
| Consistency | Perfect for uniform team photos and series. | Can lead to a “cookie-cutter” feel if overdone. |
| Color | Unlimited backdrop colors for brand alignment. | Additional backdrops may incur extra rental fees. |
| Cost | Predictable, all-inclusive environment. | Higher upfront rental cost for space and gear. |
So, who is the studio ideal for? It’s perfect for flawless headshots for your corporate profile or team page. It’s also great for brands that want a sleek, modern look. Just remember to budget for the space and work with a photographer who can add warmth to your photos.
Think of it like a tailor-made suit versus a favorite vintage jacket. The studio suit is impeccable and fits every specification. It makes a powerful statement in the right context.
Environmental Pros/Cons: context, storytelling, permits, weather
An environmental portrait is a compelling story waiting to be told. Moving to a real-world location adds depth to your image. It shows who you are, not just tells.
Imagine a software developer in a lively co-working space or a financial planner in a cozy study. These environment cues quickly share your niche, values, and personality. They make a strong, subconscious connection with your audience.
The key is often beautiful, flattering natural light. Sunlight or the soft glow of a shaded patio can add warmth and depth. This light feels real and welcoming.
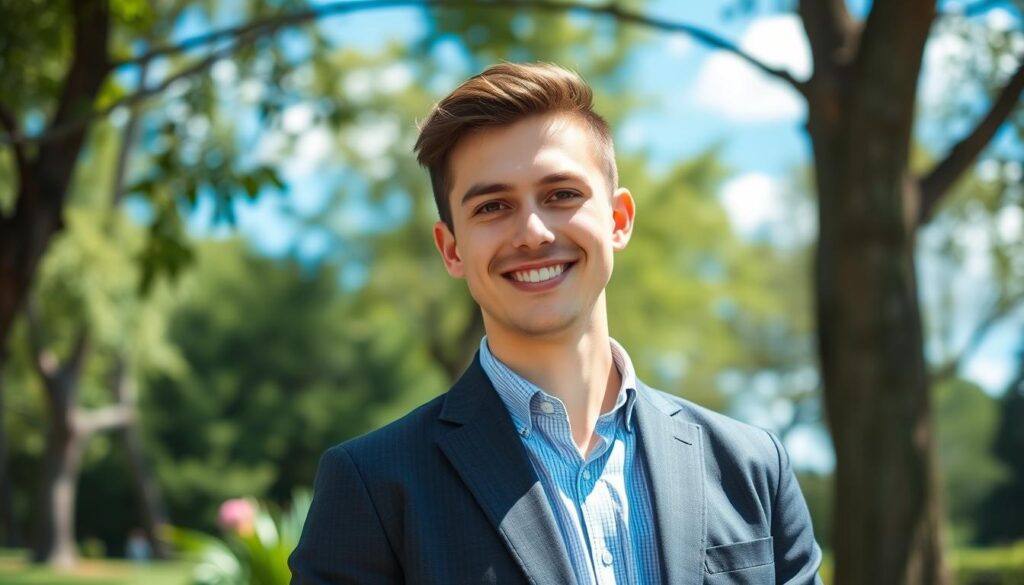
Let’s look at the benefits and challenges of outdoor headshots or location-based portraits. Knowing both sides helps plan a successful shoot!
| Aspect | Advantage (The Pro) | Challenge (The Con) |
|---|---|---|
| Context & Storytelling | Your environment gives immediate context. A park suggests wellness; an urban backdrop implies energy. These environment cues make your brand story clear and memorable. | Choosing the *right* context is key. A mismatched location can confuse your message. It needs more creative planning than a neutral studio. |
| Natural Light & Atmosphere | Beautiful, dynamic natural light is free and can create stunning, soft, and authentic looks. The changing light throughout the day offers variety. | Light is unpredictable. A sunny day can bring harsh shadows; clouds can roll in suddenly. You must be flexible and may need to reschedule due to weather. |
| Authenticity & Connection | Images feel more genuine and relatable. Clients often feel more at ease in a familiar or inspiring location, leading to more natural expressions. | The setting can sometimes distract from you, the subject. A busy street or loud park requires careful framing and composition to keep you as the focal point. |
| Logistics & Control | Unique locations can make your portfolio stand out. There’s no rental fee for public spaces, which can help budget. | Permits are often required for professional photography in public parks, city spaces, or private buildings. Weather is the biggest wildcard, impacting scheduling and comfort. |
The pros are incredibly powerful for building a relatable brand. But the cons are about preparation, not impossibility.
Always have a backup indoor location nearby if clouds threaten your outdoor headshots plan. Research permit requirements weeks in advance—many city parks have simple online applications. A great photographer will scout the location at the same time of day as your shoot to check the light.
Embracing environmental photography means embracing a little adventure. The payoff is a set of images full of life, story, and authentic natural light that truly sells you.
Backgrounds by Goal: gray, white, color gels, office, city, greenspace
Your background does more than fill empty space; it shapes how people see your story. It’s like the stage for your personal brand. The right background selection draws attention to you and shows your values.
Let’s look at the most common backdrop colors and settings. We’ll match each to specific career goals. This way, you can choose a background that boosts your message.
Studio Backdrops: Controlled & Intentional
A gray background is classic for a reason. It’s neutral, trustworthy, and keeps the focus on your face — making it ideal for corporate profiles, legal professionals, or anyone looking to communicate stability.
A white backdrop, on the other hand, is clean, modern, and open. It conveys clarity and innovation, making it a strong choice for tech founders, creatives, or medical professionals.
Want to add personality? Color gels or a painted wall can do that. A deep blue communicates confidence and reliability, while a warm amber evokes creativity and energy. Choosing backdrop colors that align with your personal or corporate brand palette ensures cohesion across all professional materials.
Just like a traveling sketchbook library, where artists refine their work and experiment with color wherever they go, selecting the right backdrop for your headshot allows you to explore different moods and impressions while staying consistent with your personal brand. Every thoughtful choice contributes to a professional and impactful visual identity.
Environmental Settings: Context & Story
Here, your background selection tells your story.
An office or library background shows professionalism and expertise. It’s perfect for consultants, executives, and academics. It says, “This is where the work gets done.”
A cityscape or urban street suggests energy, ambition, and connectivity. It’s great for entrepreneurs, real estate agents, and marketers. This backdrop tells a story of being in the heart of the action.
A greenspace, like a park or garden, communicates calm, approachability, and growth. It’s perfect for wellness coaches, therapists, or educators. It feels open and welcoming.
Not sure where to start? Use this simple guide to match your goal with a background:
- Goal: Look Neutral & Authoritative → Choose a Gray or White studio backdrop.
- Goal: Show Brand Personality → Choose Colored gels or a branded wall.
- Goal: Convey Professional Context → Choose an Office or library setting.
- Goal: Project Energy & Ambition → Choose a Cityscape background.
- Goal: Appear Approachable & Calm → Choose a Greenspace environment.
The key is intentionality. Your background should feel like a natural part of you. Ask yourself: what is the one word I want someone to feel when they see my headshot? Your background selection can make that feeling visual.
Lighting Styles: soft vs contrasty, clamshell, single-source window, strobe on location
Lighting is like an invisible sculptor for your portrait. It shapes your mood and even your jawline. We’ll make it simple! We’ll explore the two main types of light and specific setups photographers use.
Knowing this lets you tell your photographer exactly what you want. It’s the difference between a good photo and a great one.
First, let’s understand the two main families of light: soft and contrasty.
Soft light is forgiving and friendly. It’s like the light on a cloudy day. It wraps around your features, softening wrinkles and blemishes. Shadows are gentle and open. This light creates an approachable, trustworthy vibe perfect for LinkedIn or coaching websites.
Contrasty light is dramatic and authoritative. It’s like the sharp shadows on a sunny afternoon. It defines cheekbones and jawlines with precision. This style adds gravity and intensity, ideal for actors, executives, or anyone wanting to project confidence.
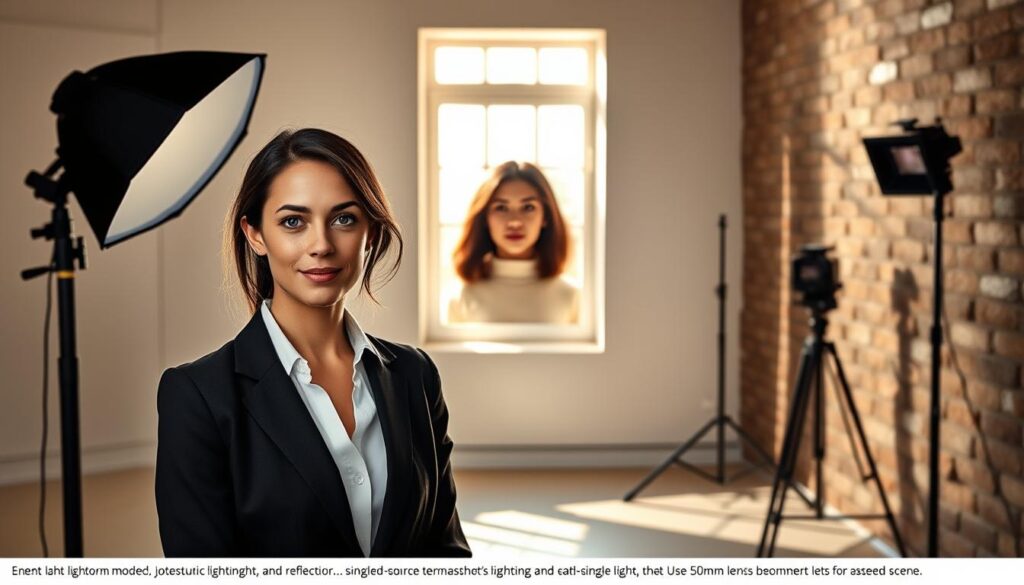
| Feature | Soft Light | Contrasty Light |
|---|---|---|
| Mood Created | Approachable, Trustworthy, Friendly | Dramatic, Authoritative, Intense |
| Shadow Detail | Very low, shadows are faint and soft | Very high, shadows are dark and defined |
| Best For | Corporate headshots, wellness professionals, general branding | Artists, speakers, entrepreneurs, creative portfolios |
| Common Source | Large studio softboxes, cloudy skies, window with sheer curtain | Small studio grids, direct sunlight, bare bulb flashes |
Now, let’s look at popular setups. In a controlled studio lighting environment, the clamshell pattern is a superstar.
It uses two lights: one directly above the camera and one just below it. This creates beautiful, even illumination that fills in under-eye shadows. The magic result? Those sparkling catchlights in your eyes that make a portrait feel alive and engaging.
- Ask for it if: You want a polished, beauty-style look with flawless skin.
- Great for: Actors’ comp cards, author bios, and personal brand portraits where a friendly, direct connection is key.
For environmental shots, mastering single-source window light is a classic skill. Here, you use one window as your main (or only) light source.
The photographer positions you close to the window. The quality of light depends on the window’s size and the weather outside! A large north-facing window gives soft, gorgeous light all day. A smaller window can create a more dramatic, contrasty look.
- Ask for it if: You want a timeless, classic feel with a connection to your environment.
- Great for: Thought leaders in an office, creatives in a workspace, or anyone wanting a natural, storytelling portrait.
Sometimes, the perfect natural light on location needs a little help. That’s where using a strobe on location comes in.
A strobe is a powerful portable flash. Photographers use it to augment the existing light. For example, it can fill in harsh shadows on a sunny day, mimicking soft light. Or, it can add a sparkle to your eyes during a golden hour portrait.
This technique blends the control of studio lighting with the authenticity of a real-world setting. It’s the best of both worlds!
Now you speak the language of light! You can look at a portrait and guess the style. More importantly, you can walk into your session and say, “I’d love a soft, clamshell look,” or “Let’s use that window for a contrasty, dramatic feel.”
That knowledge puts you in the creative driver’s seat and ensures your headshots perfectly sell your personal brand.
Case Comparisons: same subject in three settings with critique
Let’s dive into how different places change a person’s professional look. We had a leadership coach pose in three unique spots. By comparing these photos, you’ll see how environment cues and studio control affect how we see them.
Our subject is against a soft gray background. The lighting is even and controlled. This photo shows clean authority and professionalism.
There’s nothing distracting. You only see their confident look and stance. It’s a safe choice for corporate sites or LinkedIn. But, it might feel too generic without a strong, real expression.
2. The Sleek Urban Coffee Shop Vibe
This photo is set in a warm wood, subtle light, and busy café. The environment cues show a friendly and modern vibe.
Our coach looks like they’re in a deep conversation. This setting is great for brands that value connection and new ideas. But, watch out for busy backgrounds that might steal the focus.
3. The Quiet Library Setting
Surrounded by books and soft window light, this photo shows deep knowledge and thought. It suggests a wise and expert mindset.
It’s perfect for academics, authors, or strategists. Yet, the low light can make the image grainy or too dark for a lively brand.
Seeing these examples together makes the choice clear. Your setting helps tell your story.
| Setting | Perceived Vibe | Best For | Watch-Outs |
|---|---|---|---|
| Minimalist Studio | Clean, authoritative, versatile | Corporate profiles, LinkedIn, industries valuing neutrality | Can lack personality if expression is flat |
| Urban Coffee Shop | Approachable, modern, energetic | Coaches, creatives, client-facing consultants | Manage background clutter; may need permits |
| Quiet Library | Thoughtful, knowledgeable, deep | Academics, writers, researchers, strategists | Low light challenges; can skew overly serious |
This comparison shows there’s no single “best” option. It’s about finding the setting that best shows your unique professional message. Use this guide to help make your choice!
Decision Tree & Budget Planner
This section is like your personal guide. It helps you move from uncertainty to confidence. We’ll look at your choices and add real numbers to them.
Let’s start with the big picture. Your choice between studio and environmental settings depends on two main questions about your brand.
Is storytelling through context important for what I do? If yes, choose an environmental shoot. This is for coaches, artisans, realtors, or anyone whose work is tied to a place or process. Your environment is part of your message.
Do I need absolute consistency and control for a team or a corporate look? If yes, a studio is best. It removes variables, ensures uniform lighting, and gives a clean, focused portrait that fits strict brand guidelines.
Your budget is more than a number; it brings your vision to life. Below is a breakdown of common costs and how your choices affect the price.
| Cost Category | What It Covers | Price Influence & Notes |
|---|---|---|
| Photographer’s Rate | Creative direction, shooting time, basic editing. | Location scouting for environmental shots often adds to the time and cost compared to a pre-set studio. |
| Studio Rental | Use of a controlled space, backdrops, and professional lighting equipment. | A fixed hourly/daily fee. Simpler background selection (gray/white) usually has no extra cost, while colored gels or custom sets may. |
| Location Permits & Fees | Legal permission to shoot in public or private spaces (parks, lobbies, cafes). | Can range from $0 (some public spaces) to several hundred dollars. Always factor in research and application time. |
| Additional Gear/Assistants | Extra lighting for complex environmental shots or a second shooter. | More elaborate lighting setups to balance indoor/outdoor light will increase the budget. |
See how your background selection affects your budget? A studio white seamless is standard. But, choosing a vibrant color gel or a detailed office set might add a fee. An urban alleyway is free, but a prestigious corporate atrium may require a permit fee.
The key is to start with your total budget, then work backwards with your photographer. Communicate your must-haves clearly. Maybe you allocate more for the perfect location, but keep retouching minimal. It’s all about balance.
You now have a map and a calculator. You’re not just choosing a setting—you’re making an informed investment in your personal brand’s visual foundation. Let’s make it happen!
Accessibility & Logistics (Elevators, Quiet Hours)
Logistics might not be glamorous, but mastering them is key. It’s what makes a session smooth and professional. Think of it as the foundation of your shoot—if it’s solid, everything else can shine.
We want you and your photographer to focus on creating amazing images. Not on solving unexpected problems. A little planning here makes all the difference!
For studio sessions, your checklist is straightforward but vital. Always confirm these details when booking:
- Building Access: Is there a doorman or a keypad code you’ll need?
- Elevators & Loading: Can large light stands and backdrops fit in the freight elevator? Is there a loading dock?
- Parking: Is there dedicated client parking, a nearby garage, or easy street parking?
Getting these answers upfront means you walk in relaxed and ready to work.
Planning for outdoor headshots requires a deeper dive. The perfect urban wall or serene park spot comes with its own set of rules.
Your first step is permits and permissions. Many public parks and city spaces require a photography permit, for commercial use. Apply well in advance—sometimes weeks ahead. For private property, always get written permission from the owner.
Next, scout the practicalities. A great photographer will often do this, but it’s good for you to know:
- Restrooms: Are there public facilities nearby for outfit changes?
- Power Sources: If using supplemental lighting, is there an outlet or will you need a battery pack?
- Foot Traffic: When is the location least crowded? Sunrise shoots often offer empty spaces and beautiful light.
One of the most overlooked details is quiet hours. If you’re shooting in a residential neighborhood or a park with noise ordinances, be mindful of early morning or late evening restrictions. The last thing you want is to disrupt the peace (or get asked to leave)!
Always, always have a Plan B location. Weather is the great wildcard for outdoor headshots. Identify a covered alternative—a museum atrium, a warehouse with large windows, or a garage with great doors—before the day arrives. This simple step turns a rain-out into a simple change of scenery.
By thinking through these logistics—from elevators to quiet hours—you eliminate day-of surprises. You empower your photographer to operate at their creative best, which directly translates to better photos for your brand.
So, embrace the planning! It’s the secret ingredient for a smooth, successful, and stress-free headshot session.
Deliverables & Retouching Expectations
After the session, you’ll get your final images. A pro photographer gives you high-res images for printing and web-optimized ones for online use. Make sure to ask about how long it’ll take to get them so you can plan your big launch.
Retouching is where the magic happens. We aim to enhance, not change, your photos. Our editing fixes minor skin issues, softens, and removes distractions. It can even improve your studio lighting to highlight your brand.
It doesn’t matter if you chose studio or natural light. Retouching makes your photos shine. The aim is to show the real you in the best light.
Talking to your photographer is key. Share your vision before they start editing. Show them what you like and any concerns. This way, the final photos will truly reflect your brand.