Passport photography creates an unusual image problem.
Most portraits are designed to make the person look their best. A photographer can search for a flattering angle, turn the subject slightly, use dramatic lighting, soften distracting details, select a more expressive photograph and retouch the final image.
A U.S. passport photograph removes most of those options.
You have to face the camera directly. Your head needs to be centered. Your eyes must be visible. The background must be plain white or off-white. Eyeglasses have to come off in normal circumstances. And the final photograph cannot be cosmetically repaired with filters, retouching software or artificial intelligence.
That does not mean you have to settle for a bad photograph.
The better strategy is to improve everything that happens before the shutter is pressed.
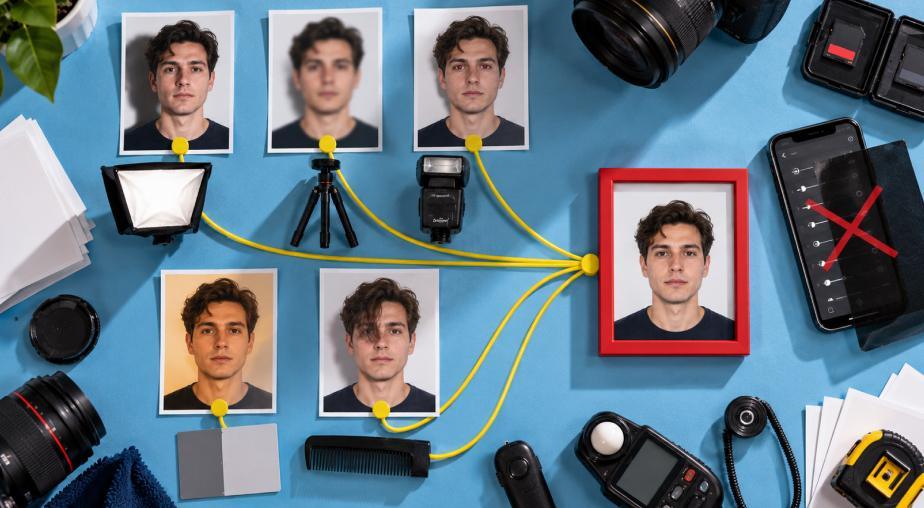
Lighting, camera distance, posture, grooming, clothing, hair and expression can dramatically affect how a passport photograph looks while remaining completely within the rules.
The distinction matters more in 2026 because the U.S. Department of State is explicitly warning applicants against digitally altered and AI-generated passport photographs.
The goal is therefore not to make yourself look different.
It is to make the photograph represent you clearly, accurately and well.
Start With The Rules Before Thinking About Appearance
For a U.S. passport application, the Department of State requires one recent color photograph.
Its current passport photo requirements specify that the image must have been taken within the previous six months and reflect your current appearance.
For a printed application, the photograph must measure 2 × 2 inches, or 51 × 51 millimeters.
The head must measure between 1 and 1 3/8 inches, or approximately 25 to 35 millimeters, from the bottom of the chin to the top of the head.
You must face the camera directly without tilting your head. Both eyes need to be open and visible, and the Department’s current passport guidance calls for a neutral expression with the mouth closed.
The background needs to be plain white or off-white without shadows, texture, objects or visible lines.
Those requirements may sound restrictive, but they also tell you where your effort should go.
You cannot improve the photograph by changing the rules.
You can improve how well you work inside them.
Good Lighting Does More Than Almost Anything Else
The biggest visual improvement is often lighting.
Passport requirements do not force you to use ugly light.
They require even light.
The State Department specifically warns against lighting that is too bright, too dim or heavily directional. Strong side lighting can create shadows across the face, while overhead lighting can produce dark eye sockets and shadows underneath the nose and chin.
Both can make a person look more tired or severe than they do in normal life.
Even frontal illumination is generally much more forgiving.
If you are taking the photograph yourself, a well-lit area with soft natural light can work effectively. The Department recommends natural lighting for digital passport photographs and emphasizes that the face and background should be free from problematic shadows.
Think about a large window rather than a small spotlight.
A large light source produces softer transitions across facial features.
That does not artificially change your appearance.
It simply allows the camera to record it more clearly.
Move Away From The Wall
Standing directly against the background is one of the easiest ways to create an unnecessary passport-photo problem.
Your body can cast a visible shadow onto the wall.
The Department of State instead advises applicants to position themselves several feet away from the white or off-white background.
That separation helps light reach the background more evenly and reduces the chance of creating a dark silhouette around your head and shoulders.
It can also make the photograph look cleaner.
If the wall in your home is not appropriate, the Department specifically suggests using a plain white blanket or sheet to cover a non-white wall.
The important point is to solve the background physically.
Do not photograph yourself against the wrong background with the intention of replacing it afterward.
Do Not Replace The Background Digitally
This is especially important under the current rules.
A background-removal app may appear to offer the perfect solution.
Photograph yourself anywhere, tap a button and replace the room with pure white.
For a passport photograph, that is the wrong approach.
The Department explicitly lists digitally altered backgrounds among unacceptable examples because editing can change the outline around the head, face and neck.
Its instructions are straightforward: if the original background is unacceptable, fix the physical background and take another photograph.
This is an important principle for the entire process.
Solve photographic problems before capture rather than repairing them afterward.
Camera Distance Can Affect How Your Face Looks
People often blame the camera when they dislike how their face looks in a photograph.
Sometimes the real problem is distance.
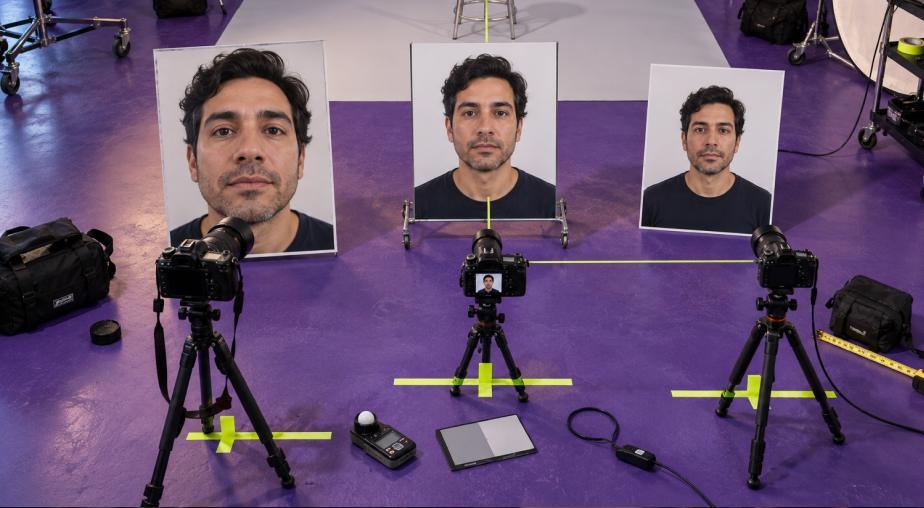
A camera positioned very close to the face can exaggerate perspective. Features closer to the lens, particularly the nose and central face, can appear proportionally larger while the ears and sides of the head recede.
A passport photograph does not require that kind of close-up capture.
The State Department tells applicants to position the camera several feet away and specifically gives roughly 1.2 meters as a useful distance in its photo guidance.
The final head size is then determined by proper framing rather than by placing the lens extremely close to the subject.
That can create a more natural-looking representation of facial proportions while still satisfying the official composition rules.
Do not attempt to fix poor perspective by digitally stretching or compressing the image afterward. The Department explicitly rejects digital alterations that distort natural appearance.
Keep The Camera At A Natural Height
Passport rules require you to look directly at the camera.
That means dramatic high-angle and low-angle portrait techniques are not appropriate.
A sensible setup places the camera roughly around eye level, with the subject looking naturally forward.
This helps avoid the visual effect of looking upward or downward toward the lens.
It also makes proper head positioning easier.
The photograph should not feel like a fashion portrait.
It should feel straightforward.
Straightforward does not have to mean careless.
Posture Still Matters
You cannot turn your head toward your preferred side.
You can still pay attention to posture.
Sit or stand comfortably upright rather than collapsing the shoulders forward.
Relax the shoulders rather than pulling them unnaturally backward.
Keep the head level instead of pushing the chin dramatically forward or tucking it excessively downward.
Small changes matter because passport photographs are visually simple.
There is no interesting environment or elaborate styling to distract from posture.
When the background is plain and the composition is centered, tension becomes surprisingly noticeable.
Take a few seconds before the photograph to settle into a natural position.
A Neutral Expression Does Not Mean Looking Miserable
One of the most common passport-photo mistakes is interpreting “neutral expression” as “look as unhappy as possible.”
Those are not the same thing.
You do not need to scowl.
Avoid clenching the jaw or aggressively pressing the lips together.
Keep the facial muscles relaxed and look directly toward the camera.
The current State Department guidance requires a neutral expression with the mouth closed for passport photographs, while its online-renewal guidance similarly tells applicants to face the camera with both eyes visible and avoid showing teeth.
The safest strategy is a calm, natural expression.
Think less about “posing” and more about allowing your face to rest normally.
A tense neutral expression can look far less natural than a relaxed one.
Your Eyes Need To Remain Clearly Visible
Your eyes are particularly important in an identification photograph.
They should be open and clearly visible.
That affects more than expression.
Hair should not fall across the eyes or obscure portions of the face.
Avoid squinting at bright lights.
If your lighting setup is so intense that you cannot comfortably keep your eyes open, change the setup rather than forcing the expression.
This is another advantage of soft, diffused illumination.
You want enough light for a clean exposure without making the subject physically uncomfortable.
Eyeglasses Normally Have To Come Off
People who wear glasses every day may naturally feel that they look more like themselves with them.
For U.S. passport photographs, however, eyeglasses generally must be removed.
That includes ordinary prescription glasses, sunglasses and tinted glasses.
There is a narrow medical exception. The Department says applicants who cannot remove their glasses for medical reasons should provide a signed doctor’s note.
Do not place glasses on top of your head for the photograph either.
Removing them before the photograph also avoids reflections and shadows around the eyes.
If you normally wear glasses continuously, give your eyes a moment to adjust before taking the picture so you are not squinting immediately after removing them.
Hair Can Change The Photograph Without Breaking Any Rules
Hair is one of the few visual elements over which you retain considerable control.
The State Department does not require one particular hairstyle.
Your entire head needs to be visible and appropriately positioned, and your hair should not block portions of your face.
That gives you room to choose a hairstyle that feels natural and recognizable.
If your usual hairstyle falls heavily across your eyes or face, consider arranging it slightly away from those areas for the photograph.
Avoid trying an unfamiliar hairstyle purely for the passport picture.
Remember that the photograph is supposed to reflect your current appearance.
The strongest choice is usually a neat version of how you normally look.
Clothing Can Improve Separation From The Background
The passport rules also leave room for normal clothing.
The State Department says applicants should wear clothing they normally wear rather than uniforms, clothing resembling uniforms or camouflage.
Because the background must be white or off-white, clothing that provides some visual separation from it can photograph more clearly than a top that nearly disappears into the background.
That does not mean you need an aggressively bright color.
A medium or darker solid color can provide clean separation while keeping attention on the face.
Extremely busy patterns can introduce unnecessary visual competition into an image that is otherwise deliberately simple.
The objective is not to create an outfit people notice.
It is to create a clean frame around the face.
Jewelry Is Usually Less Restrictive Than People Assume
Jewelry and facial piercings are generally permitted as long as they do not hide your face.
That means there is no automatic need to remove every earring or piercing.
Still, there is a photographic consideration separate from the legal requirement.
Very reflective jewelry can catch light and become visually prominent in such a small, simple portrait.
If your objective is a clean photograph, understated pieces may work better.
That is a style decision rather than a passport requirement.
The important distinction is not to confuse aesthetic advice with official rules.
Religious And Medical Head Coverings Have Specific Exceptions
Hats and head coverings generally must be removed.
There are exceptions for religious and medical purposes, with supporting documentation required in relevant application circumstances.
When an approved head covering is worn, the full face still needs to remain visible and free from shadows or obstruction.
The Department’s current guidance also specifies characteristics such as a single color without patterns or small holes for acceptable head coverings.
Applicants who need these exceptions should follow the official documentation requirements rather than trying to interpret them from photography advice alone.
Makeup Should Work Before The Photograph, Not After It
Passport rules do not prohibit ordinary makeup.
The more important issue is whether your photograph still represents your current appearance.
A passport photo is not the ideal setting for experimental makeup designed primarily for a dramatic camera effect.
If you normally wear makeup, a familiar version of your usual appearance is generally the more sensible choice.
Pay attention to how products behave under the actual light.
Extremely reflective products can produce bright highlights.
Very heavy powder can look different under direct illumination.
The key rule is what happens afterward:
do not digitally retouch the result.
If something looks wrong, adjust the real lighting, grooming or makeup and take another photograph.
Do Not Retouch Skin
This is where modern portrait habits collide most directly with passport requirements.
Many phones automatically offer skin smoothing, face reshaping, blemish removal, eye enhancement or other appearance tools.
Some camera apps apply processing without making it obvious.
For an ordinary portrait, those features may be a matter of personal preference.
For a U.S. passport photograph, they should be avoided.
The Department says applicants must submit the original, unchanged photograph and specifically prohibits alterations using computer software, phone applications, filters or artificial intelligence.
That means no skin smoothing.
No reshaping the jaw.
No removing lines.
No enlarging eyes.
No changing skin tone.
No cleaning up hair digitally.
No cosmetic AI enhancement.
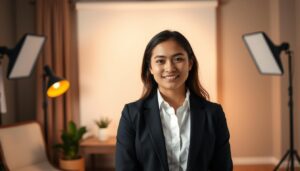
If you want to improve something, do it before capture. Studio vs. On-Location Headshots: How to Prepare for Both Like a Pro.
AI Cannot Rescue A Bad Passport Photo
This has become particularly relevant as generative image editing becomes commonplace.
AI can now replace backgrounds, alter lighting, remove objects, change clothing and make sophisticated adjustments to faces.
The fact that an AI-generated passport photograph looks convincing does not make it acceptable.
The Department’s current digital photo guidance explicitly says not to submit photographs created or edited using artificial intelligence or other digital tools.
The agency even provides an example of an AI-created image that may visually appear suitable but remains unacceptable because AI was used to produce it.
The Department also states that it checks submitted photographs for the use of artificial-intelligence tools.
For passport photography, realism is not enough.
Authenticity matters.
Do Not Digitally Fix Red Eye Either
Even a seemingly harmless correction can create problems.
Suppose flash produces red eye.
Most editing applications can repair it instantly.
The Department tells applicants not to do that.
Instead, take another photograph using a setup that does not produce red eye.
That reinforces the broader rule:
retake rather than repair.
If the image is blurry, retake it.
If the background has a shadow, retake it.
If the skin color looks inaccurate, correct the lighting or white balance and retake it.
If the eyes show red-eye artifacts, change the lighting and retake it.
Passport photography rewards good capture technique because post-production options are intentionally limited.
Accurate Skin Tone Is Part Of A Better Photograph
Looking better does not necessarily mean looking smoother or younger.
It can simply mean looking accurate.
The Department specifically calls for lighting that reproduces skin tones accurately.
Poor white balance can make skin look excessively blue, yellow or green.
Mixed lighting is a common cause.
For example, daylight coming through a window may mix with warm household bulbs, producing inconsistent color across the face.
Whenever possible, simplify the light.
Using one dominant, soft light source can make color more predictable.
If the photograph has a strange color cast at capture, fix the lighting conditions and take another one rather than applying a beauty filter afterward.
Sharpness Matters More Than Beauty Filters
An in-focus photograph almost always looks better than a soft or pixelated one.
The State Department requires a high-resolution image that is not blurry, grainy or visibly pixelated.
Set the camera to a high-quality capture setting.
Make sure the lens is clean.
Hold the camera steady or use a tripod.
Check focus on the face before completing the session.
For digital applications, avoid degrading the original photograph by repeatedly sending it through messaging services that compress images.
The Department specifically warns online applicants that sending an image through text messaging can reduce its quality.
Start with a good original file and preserve it.
Take Several Photographs Before Choosing One
Compliance does not mean you only get one attempt.
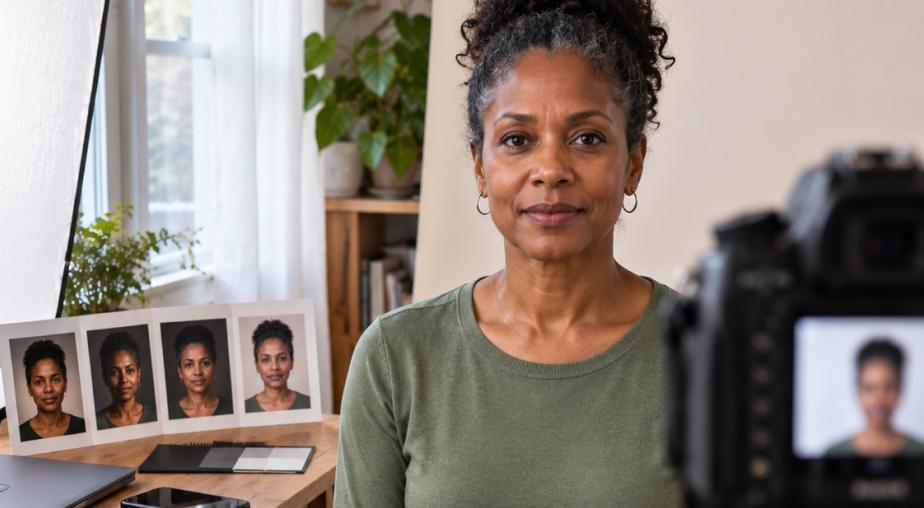
Take multiple photographs under the same acceptable setup.
Small differences in blinking, tension, posture and expression can make one frame noticeably better than another.
The advantage is that you are selecting between authentic photographs rather than manipulating one afterward.
Check each candidate for:
- even lighting and no problematic shadows;
- direct head position and clearly visible eyes;
- natural, neutral expression;
- sharp focus;
- accurate skin color;
- clear separation from the background;
- unobstructed facial features.
Then choose the frame that looks most natural while meeting every requirement.
Looking Better Is Mostly A Capture Problem
The restrictions surrounding passport photographs can actually make the process simpler.
You cannot rely on a dramatic angle.
You cannot build an elaborate background.
You cannot reshape the face.
You cannot smooth the skin.
You cannot use an AI tool to produce a more flattering version of yourself.
So the fundamentals become more important.
Use soft, even light.
Create physical distance from the background.
Keep the camera far enough away to avoid exaggerated perspective.
Position it naturally.
Relax your shoulders and face.
Choose normal clothing that separates cleanly from the white background.
Arrange your hair so your face remains visible.
Capture several sharp frames.
Most importantly, solve problems before taking the photograph rather than afterward.
That approach satisfies the purpose of an identification photograph while producing a more flattering result.
A good passport photograph should not look like a perfected version of you.
It should look like you on a well-photographed day.